 Save
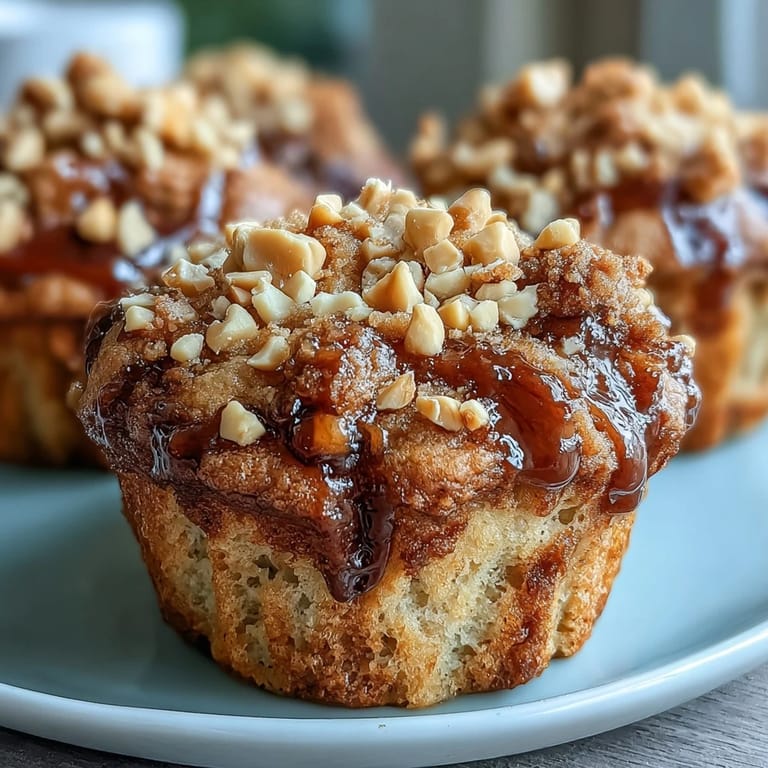
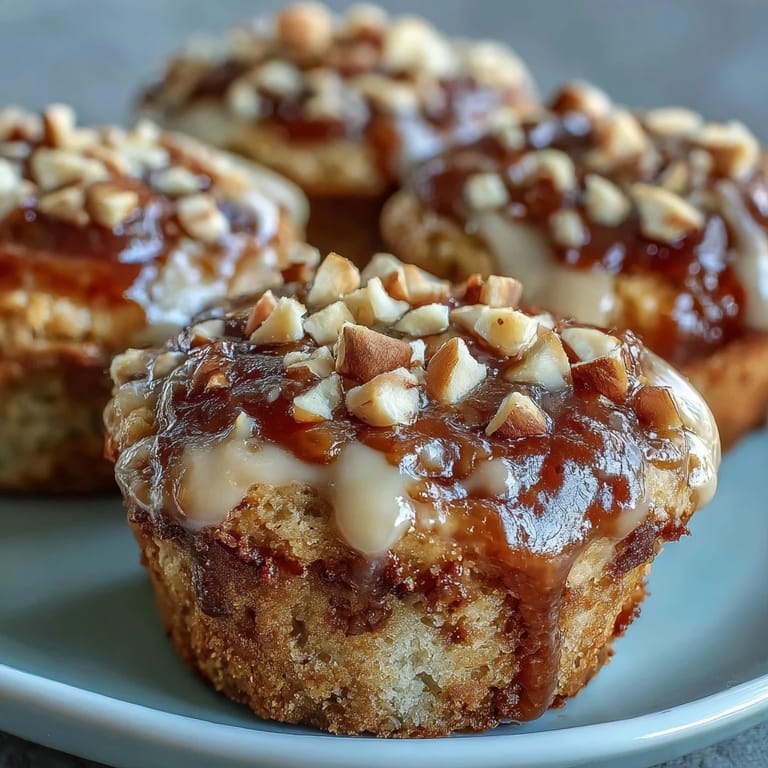
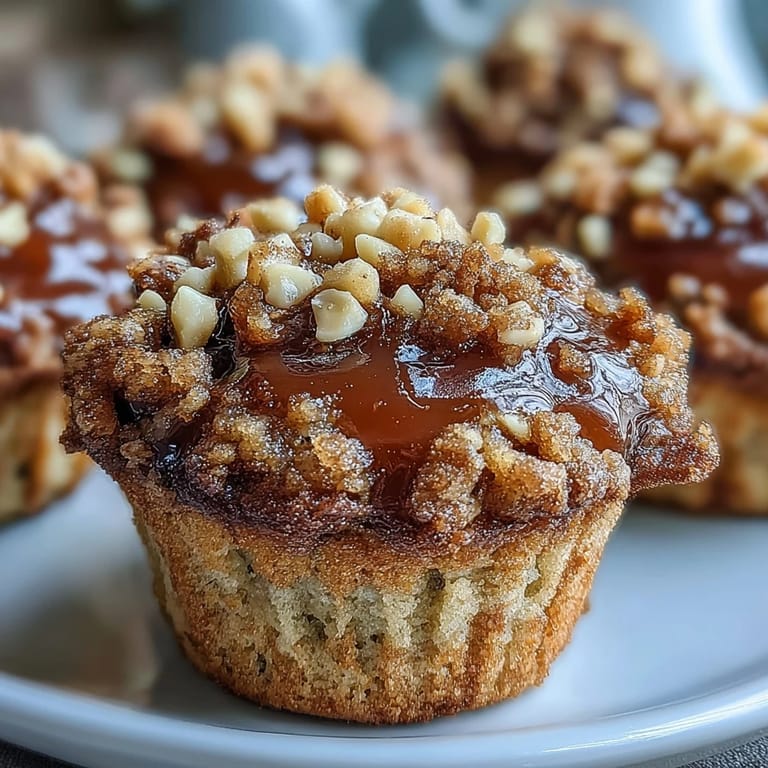
Save My coworker Sarah brought these to our office potluck, still warm from her kitchen, and somehow they disappeared before the meeting even started. She'd been experimenting with combining her two favorite flavors on toast—peanut butter and guava—and thought, why not make muffins? When I finally got to taste one that night, I understood the fuss completely. That rich peanut butter base with those pockets of tangy guava felt like comfort wrapped in a golden, moist cake, sophisticated enough for a coffee date but easy enough for a rushed Tuesday morning.
I made these for my neighbor who'd just moved in from Puerto Rico, thinking they might remind her of home in some small way. She took one bite and got quiet for a moment, then smiled and said her abuela used to make something similar but called it a dessert, not a snack. That afternoon, we ended up trading recipes over coffee, and now these muffins are the reason we became friends.
Ingredients
- All-purpose flour (2 cups): The foundation that keeps these tender, not dense—don't sift it unless you want to overthink it, just spoon and level.
- Baking powder and baking soda (1 tsp and 1/2 tsp): This combo makes them rise light and fluffy, creating those little air pockets that make each muffin feel luxurious.
- Salt (1/4 tsp): A small amount that enhances the peanut butter flavor without making anything taste salty.
- Creamy peanut butter (1/2 cup): Use the good stuff here—it's the star, so skip the natural brands with separated oil if you want smooth, predictable results.
- Unsalted butter, melted (1/2 cup): Melting it first means it blends silky into the sugar, creating that bakery-style crumb.
- Granulated sugar (1 cup): This sweetens the whole thing, but the guava adds tang, so don't skimp on either.
- Eggs (2 large): They bind everything together and add richness—room temperature eggs mix in more smoothly if you have the patience.
- Whole milk (1 cup): Creates moisture and tenderness; don't use low-fat unless you enjoy muffins that taste like cardboard.
- Vanilla extract (1 tsp): A small amount that rounds out all the flavors without announcing itself.
- Guava preserves (2/3 cup): This is where the magic happens—buy it from the Latin section of your grocery store, and check that it's thick and jammy, not runny.
- Roasted peanuts, chopped (1/4 cup optional): A textural finish that adds crunch and lets people know what they're biting into.
Tired of Takeout? 🥡
Get 10 meals you can make faster than delivery arrives. Seriously.
One email. No spam. Unsubscribe anytime.
Instructions
- Get your oven ready:
- Preheat to 350°F and line your muffin tin with paper liners—this saves cleanup and prevents sticking without any guesswork. If you're greasing instead, use butter and make sure every crevice is covered.
- Combine the dry team:
- In a medium bowl, whisk together flour, baking powder, baking soda, and salt so they're evenly distributed. This prevents pockets of baking soda that taste metallic and bitter.
- Build the wet base:
- Beat peanut butter, melted butter, and sugar together until smooth and creamy—it should look almost like frosting, not grainy. This takes about a minute with an electric mixer or two minutes of determined whisking with a fork.
- Add the eggs carefully:
- Drop in one egg, mix completely, then repeat with the second one—this prevents lumpy, curdled-looking batter. Next, stir in milk and vanilla until everything is fully incorporated and glossy.
- Marry the two mixtures:
- Fold the dry ingredients into the wet mixture gently, using a spatula or wooden spoon—stop as soon as you don't see streaks of flour anymore. Overmixing creates tough, dense muffins that taste rubbery, and we're not doing that here.
- Fill with intention:
- Spoon batter halfway up each muffin cup, then add a generous teaspoon of guava preserves in the center of each. This pocket of jam is the surprise that makes people come back.
- Top it off:
- Cover each guava pocket with another spoonful of batter so the jam stays inside during baking and creates a moist middle. Sprinkle chopped peanuts on top if you want that textural contrast and visual hint of what's inside.
- Bake with trust:
- Slide into the oven for 20–22 minutes—a toothpick inserted into the edge should come out clean, but expect some guava stickiness if it goes through the jam pocket. If the tops are browning too fast, tent loosely with foil for the last few minutes.
- Cool strategically:
- Let them rest in the pan for 5 minutes so they set enough to handle, then transfer to a wire rack to cool completely. This prevents them from sweating and becoming soggy on the bottom.
 Save
Save My sister's five-year-old called these "the best PB&J ever but warm," which felt like the highest compliment a kid could give. She started requesting them in her lunchbox, and somehow a recipe turned into a small family tradition that didn't exist before.
The Guava Question
Guava preserves might feel exotic if you've never used them, but they're worth seeking out because that tangy, floral sweetness is completely different from strawberry or raspberry. If your store doesn't carry them in the regular jam aisle, check the Latin foods section—they're there, usually in pretty glass jars that make you feel like you're cooking something adventurous. The flavor pairs with peanut butter in a way that feels both nostalgic and unexpected, like something you remember eating but can't quite place.
Storage and Make-Ahead Magic
These muffins are one of those baked goods that actually improve slightly on day two as flavors meld and the guava soaks into the crumb. Keep them in an airtight container at room temperature for up to five days, or wrap individually and freeze for up to two months—they thaw at room temperature in about an hour and taste almost as fresh as the day you baked them. I've pulled them out of the freezer more times than I've actually planned ahead, and somehow they still work perfectly for unexpected guests.
Variations and Swaps
The beauty of this recipe is how forgiving it is with substitutions, which means you can make them your own without starting from scratch. Strawberry or raspberry jam creates a more traditional PB&J vibe if guava feels too adventurous, while apricot preserves add a different kind of warmth that tastes wonderful with peanut butter. If you want extra richness, swirl a little extra peanut butter or a dot of guava on top before baking, or crown each muffin with a whole roasted peanut for elegance.
- Try almond butter instead of peanut butter for a slightly more delicate flavor and a new reason to make them again.
- Swap half the white sugar for brown sugar if you want deeper, molasses-forward notes that pair beautifully with both peanut butter and guava.
- Add a pinch of cinnamon or nutmeg to the dry ingredients for warmth that doesn't overwhelm the main flavors.
 Save
Save These muffins have become the recipe I make when I want to impress someone without making a big show of it, and they've started appearing at more potlucks and breakfasts than I ever expected. There's something deeply satisfying about turning a flavor memory into something warm and shared.
Questions & Answers
- → Can I use a different fruit preserves?
Yes, strawberry or raspberry jam work beautifully for a classic PB&J flavor profile. Apricot or fig preserves also pair nicely with peanut butter.
- → How should I store these muffins?
Store in an airtight container at room temperature for up to 3 days. For longer storage, freeze individually wrapped for up to 2 months and thaw at room temperature.
- → Can I make these gluten-free?
Substitute the all-purpose flour with a 1:1 gluten-free baking blend. Ensure your baking powder and other ingredients are certified gluten-free.
- → Why avoid inserting the toothpick in the center?
The center contains the guava preserves, which will remain sticky and gooey even when fully baked. Test the doneness at the edge where the actual batter is.
- → Can I use natural peanut butter?
Natural peanut butter works, but the results may be slightly denser. Creamy commercial peanut butter creates a lighter, more tender crumb due to added stabilizers.