 Save
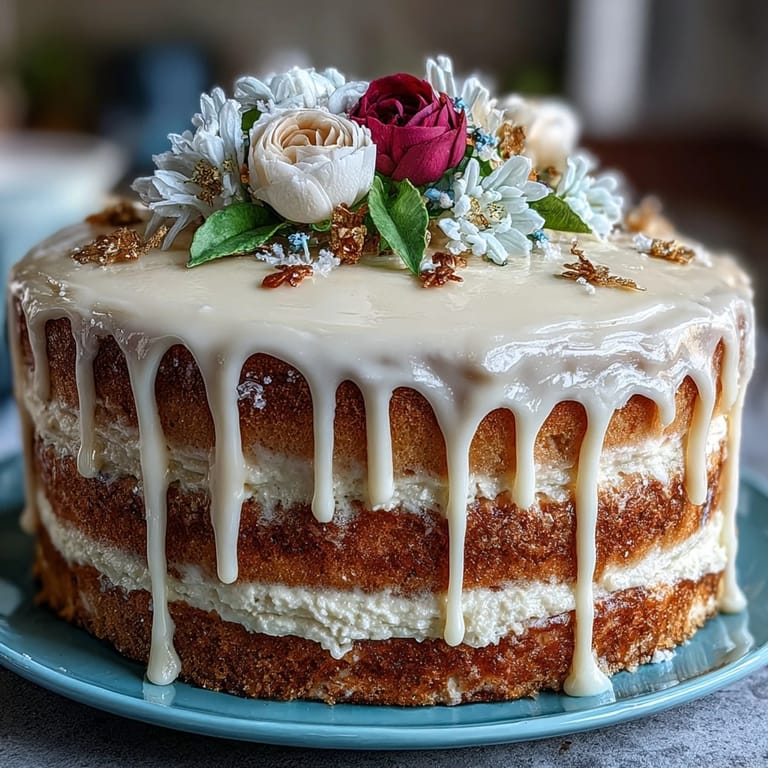
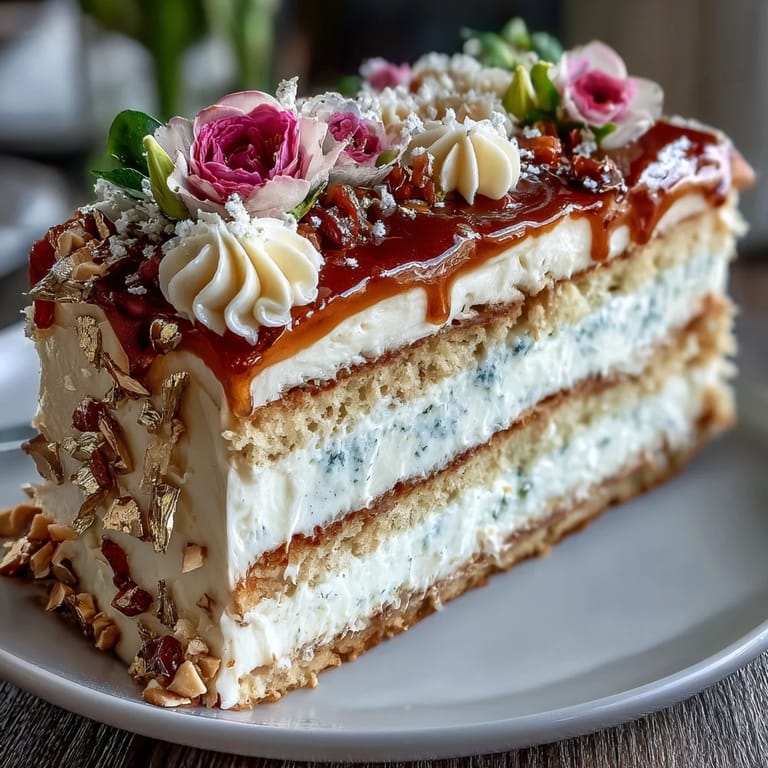
Save My friend texted me at midnight asking if I could bake something unforgettable for her sister's graduation party—and oh, the sister was a Taurus who absolutely lived for flowers and elegance. I'd never decorated a cake with piped florals before, but something about the challenge felt right, like the universe was nudging me toward learning something new. Three days later, watching her face light up when she saw those buttercream roses and vines cascading down the layers made every uncertain moment in my kitchen worth it. This cake became the cake I'd always wished I'd learned to make sooner.
I'll never forget standing in my tiny kitchen on a June morning, frosting this cake while the smell of butter and vanilla hung in the air, feeling genuinely nervous about whether the floral designs would actually look good. My partner kept poking their head in asking if they could help, and by the time I was piping the final vines, we were both laughing at how much focus three layers of cake required. That's when I realized this cake wasn't just about impressing someone at a party—it was about showing up and trying something that scared me a little, which somehow felt perfect for a graduation celebration.
Ingredients
- All-purpose flour (2 1/2 cups): The structure of everything—don't skip sifting it with the baking powder and salt, because lumps will whisper themselves into your cake.
- Baking powder (2 1/2 tsp): This is what gives the cake its tender crumb and lift; use fresh powder that hasn't been sitting in your cabinet since 2019.
- Salt (1/2 tsp): Just enough to make all the other flavors pop without tasting salty.
- Unsalted butter (1 cup for cake, 1 1/2 cups for frosting): Room temperature is non-negotiable—cold butter won't cream properly and you'll spend thirty minutes wondering why your batter looks grainy.
- Granulated sugar (2 cups): The sweetness foundation, and beating it with butter properly creates air pockets that make the cake impossibly light.
- Eggs (4 large, room temperature): Temperature matters because cold eggs won't incorporate smoothly and can cause your batter to separate like a bad relationship.
- Pure vanilla extract (1 tbsp for cake, 2 tsp for frosting): The secret ingredient that makes people ask what you did differently—and now you know.
- Whole milk (1 cup, room temperature): Keeps the crumb delicate; cold milk can seize the batter slightly.
- Powdered sugar (5 cups for frosting): Sift it before using, even if the package says it's pre-sifted, because lumps in your frosting feel like betrayal.
- Heavy cream or milk (2-4 tbsp): The magic liquid that brings frosting to exactly the right consistency—start with 2 tablespoons and add slowly.
- Gel food coloring: Gel is stronger than liquid, so you won't water down your frosting trying to get those delicate floral shades.
- Edible gold leaf or sprinkles (optional): For that Taurus touch of elegance, if you're feeling it.
Tired of Takeout? 🥡
Get 10 meals you can make faster than delivery arrives. Seriously.
One email. No spam. Unsubscribe anytime.
Instructions
- Prepare your stage:
- Preheat the oven to 350°F and line three 8-inch cake pans with parchment—this matters because a stuck cake is a ruined cake. Grease the paper too, because parchment can be stubborn.
- Mix the dry foundations:
- Whisk flour, baking powder, and salt in a bowl until they're evenly distributed. This step aerates the flour and ensures even rising.
- Cream the butter and sugar:
- Beat softened butter with sugar for 3-4 minutes until it looks pale, fluffy, and almost like fluffy clouds—this is where the cake's tenderness begins. If it still looks grainy after four minutes, keep going for another minute or two.
- Incorporate the eggs:
- Add eggs one at a time, beating well after each addition so they fully blend in. Rushing this step means your batter separates and your cake becomes dense.
- Add the vanilla:
- Mix in vanilla extract until it's fully incorporated into the buttery mixture.
- Alternate wet and dry:
- Starting with flour, add the dry mixture and milk in three alternating batches—flour, then milk, then flour, then milk, then flour—mixing just until combined each time. Overmixing develops gluten and toughens the cake.
- Fill and smooth:
- Divide batter evenly among the three pans and smooth the tops with an offset spatula so they bake evenly.
- Bake with patience:
- Bake for 28-35 minutes until a toothpick inserted in the center comes out clean—ovens vary, so start checking at 28 minutes. The cakes should smell absolutely incredible when they're done.
- Cool gradually:
- Let cakes cool in pans for 10 minutes before turning them out onto wire racks. This prevents them from cracking and allows them to firm up just enough to handle.
- Make the frosting:
- Beat softened butter until it's creamy, then gradually add sifted powdered sugar while beating to avoid lumps. This gradual approach keeps everything smooth.
- Achieve the right texture:
- Add vanilla and 2 tablespoons of heavy cream, then beat for 3-4 minutes until fluffy—add more cream if needed to reach spreadable consistency. Too thick and it'll tear the cake; too thin and it'll slide everywhere.
- Color your florals:
- Divide frosting into separate bowls and tint each with gel coloring to create your palette—soft greens for leaves, blush pinks for roses, purples for lavender.
- Level and layer:
- If needed, trim cake tops to make them level, then place the first layer on your serving plate. Spread a layer of frosting between each cake layer, then repeat.
- Apply the crumb coat:
- Spread a thin layer of frosting over the entire cake to seal in crumbs, then chill for 20 minutes—this step prevents those little cake crumbs from getting mixed into your final coat.
- Final frosting coat:
- Apply a smooth, generous coat of frosting over the chilled cake using an offset spatula.
- Pipe the florals:
- Using piping bags with floral tips, create roses, peonies, leaves, and vines on the cake—work from the bottom up so gravity helps the design stay in place. This is where it gets fun and where your hands will cramp a little, but it's worth it.
- Add the special touches:
- If desired, apply edible gold leaf or sprinkles for a Taurus accent or graduation symbol on top.
- Chill and serve:
- Refrigerate until ready to serve, then bring the cake to room temperature before slicing so the frosting is silky instead of hard.
 Save
Save When the birthday girl walked into that party and saw the cake, she actually gasped—and then she just stood there looking at it for a full minute before saying it was too pretty to cut. Her mother told me later that she took about fifty photos of it from different angles, and somehow that felt like the truest form of compliment. Sometimes a cake becomes a memory before it even becomes dessert.
The Vanilla Cake Formula That Never Fails
I've learned that great vanilla cakes aren't about complexity—they're about respecting each ingredient's role and not rushing the process. The creaming of butter and sugar is where the magic lives, because that's where you're incorporating air that will transform into tenderness. Temperature control throughout matters more than anything fancy, and patience between steps is the real secret ingredient that no one wants to hear.
Piping Florals Without Professional Training
The first time I tried piping, I was convinced I'd need years of pastry school to make it look decent—but the truth is, a petal tip and a gentle hand create believable flowers surprisingly fast. Watching tutorials helped, but honestly, just starting with simple roses and practicing on parchment paper first took away most of the pressure. Your florals don't need to be perfect; they just need to feel like they came from somewhere genuine, and somehow people sense that.
Making This Cake Your Own
This cake is a beautiful canvas for personalization, and that's part of what makes it feel celebratory instead of just ordinary. You can shift the flavor by adding almond extract, match the frosting colors to school colors or favorite flowers, or create a design that tells something about the person you're celebrating. The bones of the recipe are solid enough to hold whatever creative vision you bring to it.
- Add 1 teaspoon of almond extract to the cake batter for a subtle depth that makes people wonder what you did differently.
- Pipe your florals onto parchment paper first and chill them, then transfer them to the cake for intricate designs that feel more controlled.
- Match your flower colors and designs to the person's birth month, favorite colors, or school spirit for a touch that feels personal and intentional.
 Save
Save This cake teaches you that the most meaningful celebrations are the ones where someone actually took time to learn something new just for you. Bake it, decorate it, and watch it become the centerpiece of someone's memory—because food made with attention and care tastes like more than just ingredients.
Questions & Answers
- → What type of flour is used for the cake?
All-purpose flour is recommended to provide the right texture for the layered cake.
- → How do I achieve the floral buttercream designs?
Use gel food coloring to tint the buttercream in floral shades and pipe petals, leaves, and vines with assorted piping tips.
- → Can I prepare the cake layers in advance?
Yes, bake and cool the cake layers beforehand, then assemble and decorate closer to serving time for freshness.
- → What is the purpose of chilling the crumb coat?
Chilling the crumb coat helps seal in crumbs, creating a smooth surface for the final buttercream layer.
- → Are there suggestions for flavor enhancements?
Adding almond extract to the batter offers an extra layer of flavor complementing the vanilla base.
- → What tools are essential for decorating?
An electric mixer, piping bags, varied floral piping tips, and optionally a cake turntable ensure precise and elegant decoration.