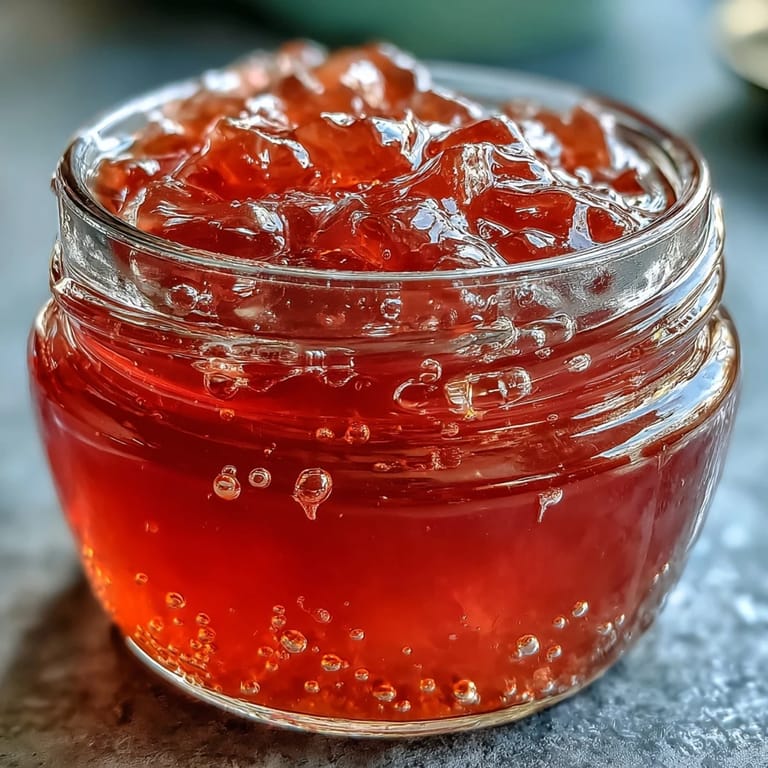
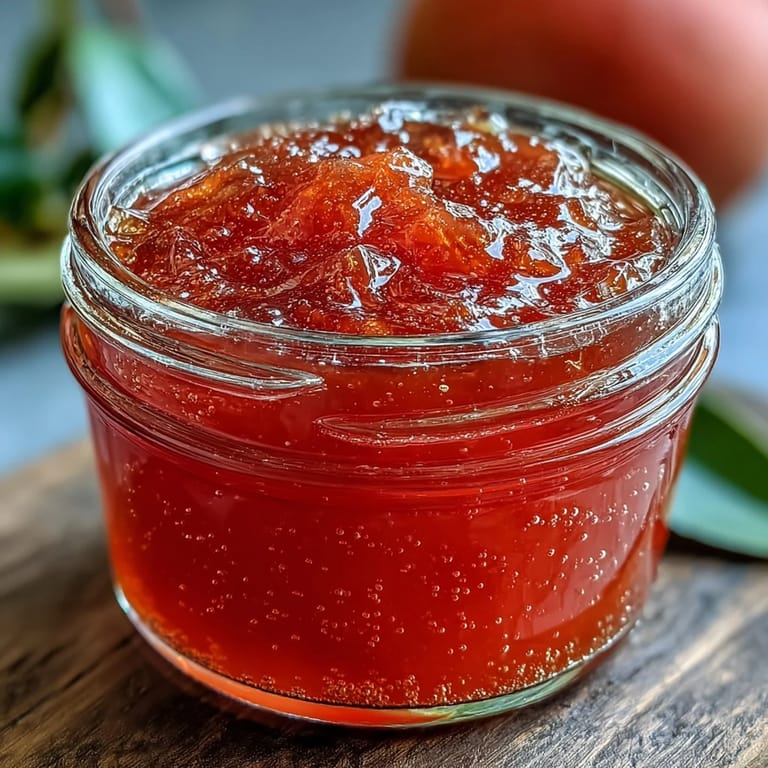
Guava Jelly Homemade

Featured in: Weekend Basil-Home Favorites

Craft your own vibrant guava jelly using ripe fruit, sugar, and lemon juice. This jewel-toned preserve captures the tropical essence of fresh guavas in a smooth, spreadable form perfect for breakfast toast, afternoon tea treats, or as a glaze for cakes and pastries. The process involves simmering fruit, extracting clear juice, and cooking with sugar until it reaches the perfect gel stage. The result is a luscious, translucent preserve that stores beautifully and makes an excellent homemade gift.

Updated on Fri, 06 Feb 2026 14:36:25 GMT
A glass jar filled with homemade guava jelly, its ruby-pink hue glowing against a slice of buttered toast. Save
A glass jar filled with homemade guava jelly, its ruby-pink hue glowing against a slice of buttered toast. | basilpeak.com

Capture the vibrant essence of the tropics with this homemade guava jelly. This jewel-toned preserve is a shimmering, ruby-pink spread that brings the sweet and floral aroma of ripe guavas to your breakfast table. Whether you are an experienced canner or a first-timer, this recipe results in a crystal-clear jelly that is as beautiful to look at as it is delicious to eat.

A glass jar filled with homemade guava jelly, its ruby-pink hue glowing against a slice of buttered toast. Save
A glass jar filled with homemade guava jelly, its ruby-pink hue glowing against a slice of buttered toast. | basilpeak.com

What's for Dinner Tonight? 🤔

Stop stressing. Get 10 fast recipes that actually work on busy nights.

Free. No spam. Just easy meals.

The process of making jelly is a rewarding kitchen ritual. By extracting the juice through a patient straining process, you achieve a level of clarity and purity that store-bought versions simply cannot match. This guava jelly is perfect for anyone looking to add a touch of elegance to their preserve collection.

Ingredients

Tired of Takeout? 🥡

Get 10 meals you can make faster than delivery arrives. Seriously.

One email. No spam. Unsubscribe anytime.

  • Fruit
  • 1.5 kg (about 3.3 lbs) ripe guavas
  • 4 cups water
  • Sweetener & Gelling
  • 4 cups granulated sugar
  • 2 tbsp lemon juice

Instructions

Step 1
Wash the guavas thoroughly. Cut them into quarters, leaving skins and seeds intact.
Step 2
Place guava pieces in a large saucepan. Add water and bring to a boil over medium heat.
Step 3
Reduce heat and simmer for 30 minutes, or until the fruit is very soft.
Step 4
Line a large strainer with a double layer of cheesecloth and set over a bowl. Pour the cooked fruit and liquid into the strainer. Let it drip undisturbed for at least 2 hours (or overnight) to extract clear juice. Do not press or squeeze, to keep the jelly clear.
Step 5
Measure the extracted juice. For each cup of juice, use 1 cup of sugar. Pour juice into a clean saucepan, add lemon juice, and stir in the sugar.
Step 6
Bring the mixture to a boil over high heat, stirring to dissolve the sugar.
Step 7
Boil rapidly until the mixture reaches gel stage (220°F/104°C on a candy thermometer), about 15–20 minutes. Skim off any foam.
Step 8
Test for doneness by placing a small spoonful of jelly on a cold plate. If it wrinkles when pushed, its ready.
Step 9
Pour hot jelly into sterilized jars, leaving 1/4-inch headspace. Seal immediately.
Step 10
Let cool completely before storing in a cool, dark place.

Zusatztipps für die Zubereitung

For extra clarity, avoid pressing the fruit while straining through the cheesecloth. To ensure a good set, you may want to use slightly underripe guavas, as they contain more natural pectin than fully ripe ones.

Still Scrolling? You'll Love This 👇

Our best 20-minute dinners in one free pack — tried and tested by thousands.

Trusted by 10,000+ home cooks.

Varianten und Anpassungen

This vibrant jelly is excellent as a glaze for fruit tarts or cakes. It also serves as a flavorful filling for thumbprint cookies or as a layer in sophisticated sponge cakes.

Serviervorschläge

Serve this preserve on warm buttered toast or use it as a topping for desserts and yogurt. It makes a beautiful gift when presented in sterilized glass jars.

A spoon dipping into shimmering guava jelly, revealing the smooth, spreadable texture from ripe guava reduction. Save
A spoon dipping into shimmering guava jelly, revealing the smooth, spreadable texture from ripe guava reduction. | basilpeak.com

Enjoy the sweet, tropical reward of your labor. Homemade guava jelly is a delightful way to preserve the seasons and bring a splash of color to your kitchen table. Happy canning!

Questions & Answers

How long does homemade guava jelly last?

Properly sealed and stored jars will keep for up to one year in a cool, dark place. Once opened, refrigerate and consume within three weeks for best quality and flavor.

Why shouldn't I press the fruit while straining?

Pressing or squeezing the fruit releases cloudiness and particles into the juice, resulting in cloudy jelly. Letting it drip naturally through cheesecloth produces the clear, jewel-toned appearance that makes this preserve so beautiful.

Can I use underripe guavas?

Yes, actually! Slightly underripe guavas contain more natural pectin, which helps the jelly set properly. A mix of ripe and slightly underripe fruit often yields the best results for both flavor and texture.

What's the best way to test if the jelly is ready?

The cold plate test works beautifully: place a spoonful of hot jelly on a chilled plate, wait one minute, then gently push with your finger. If the surface wrinkles, it has reached the proper setting point. A candy thermometer reading 220°F (104°C) also indicates doneness.

What can I use guava jelly for?

This versatile preserve shines spread on toast or biscuits, filling thumbprint cookies, glazing pound cakes or cheesecakes, swirling into yogurt, or even as a sweetener for homemade vinaigrettes. It pairs exceptionally well with cream cheese and sharp cheeses.

20-Minute Dinner Pack — Free Download 📥

10 recipes, 1 shopping list. Everything you need for a week of easy dinners.

Instant access. No signup hassle.

Guava Jelly Homemade

Transform ripe guavas into jewel-toned preserves ideal for toast, pastries, and dessert toppings.

Time to Prep
20 min
Time to Cook
45 min
Overall Time
65 min
Recipe by Hailey Evans


Skill Level Medium

Cuisine International

Portions 64 Number of Servings

Diet Preferences Plant-Based, Without Dairy, No Gluten

What You'll Need

Fruit

01 3.3 lbs ripe guavas, washed and quartered with skins and seeds intact
02 4 cups water

Sweetener & Gelling

01 4 cups granulated sugar
02 2 tablespoons fresh lemon juice

Steps

Step 01

Prepare Guavas: Wash guavas thoroughly under running water. Cut each fruit into quarters, retaining skins and seeds for natural pectin extraction.

Step 02

Cook Fruit: Place guava quarters in a large saucepan, add water, and bring to a rolling boil over medium heat. Reduce heat and simmer for 30 minutes until fruit becomes very soft and breaks down completely.

Step 03

Strain Juice: Line a large strainer with double-layered cheesecloth and position over a clean bowl. Carefully pour cooked fruit mixture into strainer and allow to drain undisturbed for minimum 2 hours or overnight to extract clear juice. Do not press or squeeze the fruit to maintain clarity.

Step 04

Measure and Combine: Measure extracted guava juice and pour into a clean saucepan. For each cup of juice, add 1 cup granulated sugar and 2 tablespoons lemon juice. Stir until sugar begins to dissolve.

Step 05

Reach Gel Stage: Bring mixture to a rapid boil over high heat, stirring constantly to fully dissolve sugar. Continue boiling for 15-20 minutes while monitoring with a candy thermometer until mixture reaches 220°F. Skim away any foam that rises to surface.

Step 06

Test Doneness: Place a small spoonful of hot jelly on a cold plate and allow to cool slightly. Push jelly with a spoon; if it wrinkles and holds its shape, gel stage is achieved.

Step 07

Jar and Seal: Pour hot jelly into sterilized glass jars, leaving 1/4-inch headspace below rim. Seal jars immediately with sterilized lids to create an airtight seal.

Step 08

Cool and Store: Allow jars to cool completely at room temperature before transferring to a cool, dark storage location. Opened jars should be refrigerated and consumed within 3 weeks.

You Just Made Something Great 👏

Want more like this? Get my best easy recipes — free, straight to your inbox.

Join 10,000+ home cooks. No spam.

Tools Needed

  • Large heavy-bottomed saucepan with at least 8-quart capacity
  • Cheesecloth (double-layered)
  • Large fine-mesh strainer
  • Measuring cups with clear markings
  • Candy thermometer with 220°F capability
  • Sterilized glass preserving jars with fitted lids

Allergy Advice

Look into all items for allergy risks and talk with a healthcare provider with any concerns.
  • Contains no common allergens; however, always verify sugar packaging and other ingredient labels for potential cross-contamination information

Nutritional Details (by portion)

Details here are informative and do not replace personalized medical guidance.
  • Caloric Value: 55
  • Fats: 0 g
  • Carbohydrates: 14 g
  • Proteins: 0 g

Cooking Shouldn't Be Hard ❤️

Get a free recipe pack that makes weeknight dinners effortless. Real food, real fast.

Free forever. Unsubscribe anytime.