 Save
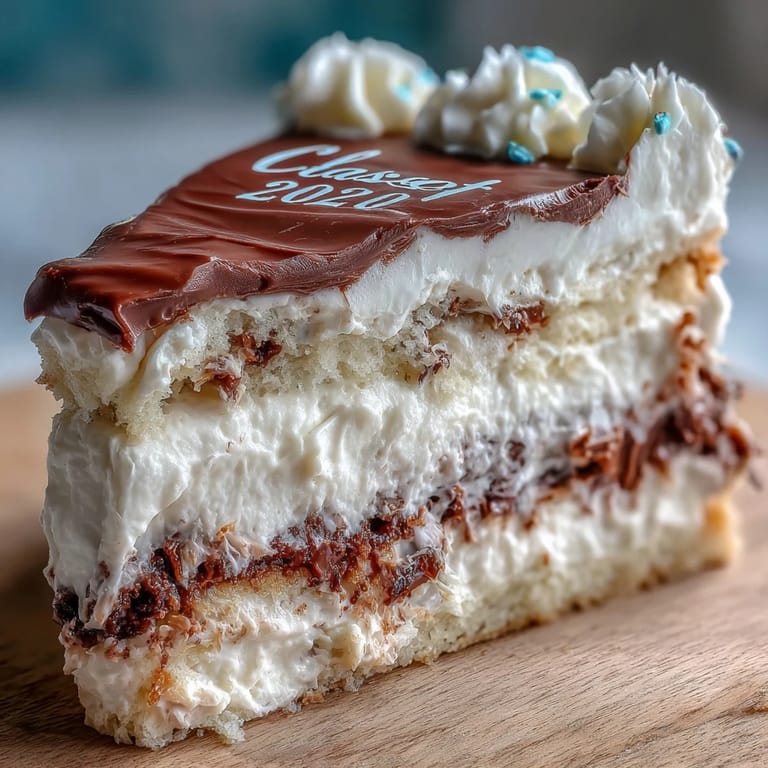
Save There's something about baking a sheet cake the night before a big celebration that makes the kitchen feel like the center of the universe. My neighbor knocked on my door three days before her daughter's graduation, asking if I could whip up something festive for the party, and I found myself standing in front of my oven at 10 PM, watching vanilla cake rise through the glass like it was performing its own quiet magic. The smell of butter and vanilla filling the house at that hour felt like a small rebellion against the ordinary, a way of saying, this moment matters enough to bake for it. This cake became the backdrop for so many photos that night, but what I remember most is the graduate's face when she saw her class year piped across the frosting in her school colors. Sometimes the simplest recipes carry the biggest moments.
I learned the true power of this cake when my sister's book club voted to have their monthly meeting at her house and she panicked about bringing dessert. She made this cake the morning of, and by evening, three people were asking for the recipe and one person was already planning to bake it for her son's birthday. The ease of it meant she could focus on hosting, and the cake showed up looking like she'd spent hours fussing when really she'd just mixed, baked, and frosted.
Ingredients
- All-purpose flour: Two and a half cups is the foundation—too little and the cake crumbles, too much and it gets dense, so weigh it if you can.
- Baking powder: Two and a half teaspoons gives that tender lift without any metallic aftertaste you get from overworking the leavening.
- Salt: A half teaspoon sounds small but it brightens the sweetness and makes the vanilla sing.
- Unsalted butter: One cup for the cake and another for frosting—room temperature is non-negotiable because cold butter won't cream properly and you'll end up with a denser crumb.
- Granulated sugar: One and three-quarter cups dissolves into the butter to create that light, fluffy base that makes people think you went to baking school.
- Eggs: Four large eggs at room temperature emulsify better and create a more uniform texture than cold ones straight from the fridge.
- Vanilla extract: One tablespoon in the batter plus two teaspoons in the frosting—quality vanilla makes a noticeable difference, so splurge a little.
- Whole milk: One cup at room temperature alternated with flour keeps the batter from getting tough and creates that delicate crumb.
- Powdered sugar: Four cups sifted means no lumpy frosting—take the ten seconds to sift it or your piping work will be fighting you.
- Food coloring: A few drops in school colors transforms a plain cake into something that feels intentional and celebratory.
Tired of Takeout? 🥡
Get 10 meals you can make faster than delivery arrives. Seriously.
One email. No spam. Unsubscribe anytime.
Instructions
- Set your stage:
- Preheat the oven to 350 degrees and prepare a 9 by 13 sheet pan with greasing and parchment paper—this keeps the cake from sticking and makes cleanup feel less like punishment. Let all your ingredients sit on the counter for about fifteen minutes so everything is at room temperature when you start mixing.
- Build the dry team:
- Whisk together the flour, baking powder, and salt in a medium bowl, which distributes the leavening evenly throughout the batter. Set it aside and feel satisfied that you've done the most important prep work.
- Cream butter and sugar:
- Beat the softened butter and sugar together for about three minutes until it looks pale and fluffy, like clouds made of sugar crystals—this is where the cake's texture is born. You'll know it's ready when you can't feel the grittiness of sugar between your fingers and the mixture looks almost mousse-like.
- Add eggs one at a time:
- Drop in each egg individually and beat well after each addition so it fully incorporates before the next one arrives. This prevents that scrambled texture that happens when you dump all the eggs in at once.
- Mix in vanilla:
- Add your vanilla extract after the last egg and beat until it's combined, which takes just about thirty seconds.
- Alternate wet and dry:
- Here's where patience pays off: add the flour mixture and milk in three parts each, starting and ending with flour, and mix until just combined—you're looking for no visible dry flour but not smooth like batter, more like the flour was just introduced to the milk. Overmixing at this point is how you accidentally make tough cake.
- Pour and smooth:
- Transfer the batter to your prepared pan and use a rubber spatula to even out the top so it bakes uniformly. A level cake is a beautiful cake.
- Bake with patience:
- Slide it into the oven for thirty to thirty-five minutes—it's done when a toothpick inserted into the center comes out clean or with just a few moist crumbs clinging to it. The moment you pull it out, the kitchen will smell like celebration.
- Cool completely:
- Let the cake rest in the pan on a wire rack until it's completely cool to the touch, which takes about an hour—this prevents the frosting from melting into puddles across a warm cake.
- Prepare the frosting:
- Beat softened butter until it's creamy and pale, then gradually add the sifted powdered sugar along with milk, vanilla, and a pinch of salt, beating for three to five minutes until it's fluffy and light. If it seems too stiff, add a splash more milk; too soft, add a bit more powdered sugar.
- Tint if desired:
- Divide the frosting into smaller bowls and add a few drops of food coloring in your chosen school colors, stirring gently until the color is even throughout. Food coloring is concentrated, so a little truly goes a long way.
- Frost the cake:
- Spread an even layer of buttercream across the cooled cake using an offset spatula or the back of a spoon, taking your time to make it level. An even frosting base makes piping look intentional rather than accidental.
- Pipe the celebration:
- Fit a piping bag with a small round tip, fill it with your desired color, and carefully pipe Class of 2026 across the top—practice on a piece of parchment first if you're nervous. Let the piping dry for a few minutes before adding sprinkles or other decorations so they stick to the frosting rather than sliding off.
 Save
Save The real magic of this cake revealed itself when my cousin's high school best friends came to the graduation party and spent twenty minutes just standing around the dessert table talking about how perfect it was—not because it was complicated or fancy, but because it was exactly what the moment needed. A simple cake in school colors, with the year piped across the top, became the visual centerpiece that made everyone feel like they were part of something worth celebrating.
Why Sheet Cakes Rule Graduation Parties
Sheet cakes are the unsung heroes of group celebrations because they feed more people than individual cupcakes, they're easier to decorate than layer cakes, and they actually get eaten at the party instead of sent home in a box. One cake serves sixteen people and looks impressive on a table without requiring the architectural ambitions of a three-layer design. Plus, sheet cakes stay moist longer than taller cakes because there's less surface area exposed to air, so if your party runs long or the cake sits for a few hours, it still tastes fresh.
The Personalization Potential
This cake is your canvas, and food coloring is your paintbrush—every graduating class has colors, and matching them feels like you've created something intentional rather than generic. I've seen this cake done in navy and gold, maroon and white, even neon colors for kids who wanted something bold. You can pipe just the class year, or add names around the edges, or let the sprinkles do most of the talking and keep the piping simple.
Storage and Make-Ahead Wisdom
You can bake this cake a day or two ahead and store it covered at room temperature, which means less stress on the actual day of the party. If you're frosting it ahead, keep it in a cool spot because buttercream softens in the heat and your piping will look melted by evening. The cake actually tastes best at room temperature, so pull it from the fridge about thirty minutes before serving if you've chilled it, which lets the crumb soften back to its tender best.
- Wrap the unfrosted cake tightly in plastic wrap if storing overnight so it doesn't dry out.
- Prepare the frosting the morning of the party and refrigerate in an airtight container until you're ready to frost.
- Assemble everything—frosting, piping bags, food coloring—before you start decorating so you're not hunting for supplies mid-piping.
 Save
Save This cake has a way of becoming part of the memory of a big moment, which is exactly what dessert should do. Bake it with confidence, frost it with intention, and watch it become the reason people linger at the table and ask for the recipe.
Questions & Answers
- → What flour is best for this cake?
All-purpose flour provides the ideal texture and structure for a tender, moist sheet.
- → How can I make the buttercream smoother?
Beat the butter thoroughly until creamy before gradually adding powdered sugar and milk for a fluffy, smooth finish.
- → Can I use alternative milk in the batter?
Non-dairy milk substitutes work well as long as they suit dietary preferences and maintain moisture balance.
- → What’s the best way to keep the cake fresh?
Store covered at room temperature for up to 2 days or refrigerate up to 5 days to maintain freshness and moisture.
- → How to achieve vibrant piping colors?
Use gel or paste food coloring in the buttercream for bright, consistent hues ideal for decorative piping.