Save
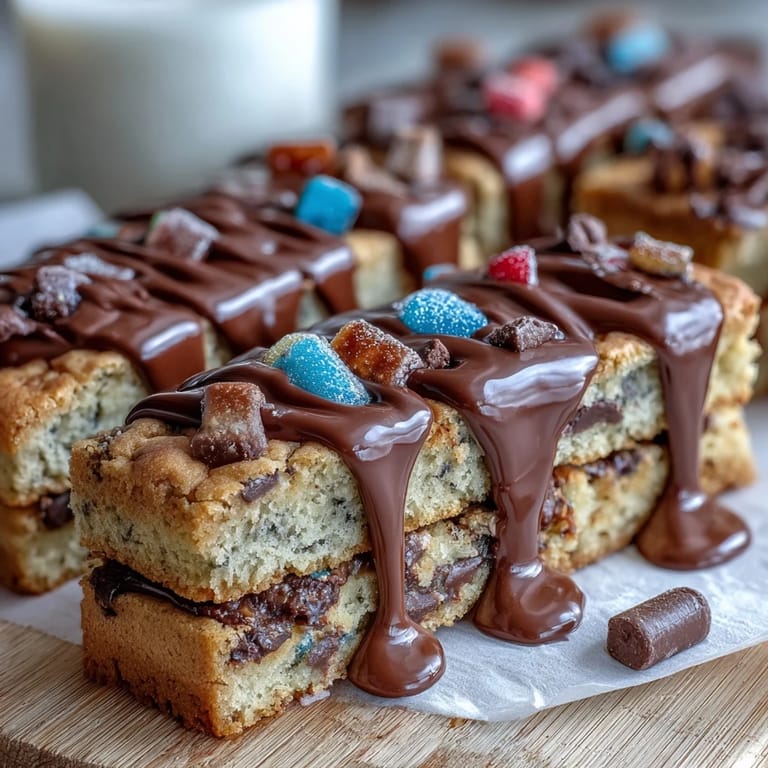
Save My neighbor brought these to her son's graduation party, and I watched people gravitate toward the pan like it was a magnet. The white chocolate drizzle caught the sunlight streaming through her kitchen window, and suddenly everyone wanted the recipe. I realized then that sometimes the best celebration food isn't complicated, just thoughtful, and these bars hit that sweet spot perfectly.
I made a batch for my colleague's daughter's graduation last spring, and the kitchen filled with the kind of warm, buttery smell that makes you want to just sit there and breathe. When I pulled them from the oven and saw those little candy pieces peeking through, I knew I'd nailed it, and honestly, the confidence boost from baking something that looked fancy felt almost as good as the eating part.
Ingredients
- All-purpose flour (2 1/4 cups): The foundation that keeps these bars tender without being cake-like, and measuring by weight is worth it if you have a scale.
- Unsalted butter (1 cup, melted): Melted butter gives a different texture than creamed butter, making these denser and chewier in the best way.
- Brown sugar and granulated sugar (combined 1 1/2 cups): The brown sugar brings molasses depth while the granulated sugar keeps things balanced and prevents over-browning.
- Eggs and vanilla extract: Two large eggs bind everything together, and pure vanilla extract matters more here than you'd think since you taste it in every bite.
- Semi-sweet chocolate chips (1 cup): Don't cheap out on chocolate; decent chips melt smoothly and taste like actual chocolate.
- Colored candy-coated chocolates (1/2 cup): These are pure celebration, and choosing your school colors makes the whole thing feel intentional and festive.
- White chocolate (4 oz): The vegetable oil keeps it drizzle-able and prevents the white chocolate from seizing up on you during melting.
Tired of Takeout? 🥡
Get 10 meals you can make faster than delivery arrives. Seriously.
One email. No spam. Unsubscribe anytime.
Instructions
- Set up and preheat:
- Line your 9x13-inch pan with parchment paper, letting the edges hang over the sides like little handles. This makes pulling out your finished bars so much easier, and you'll wonder why you ever did it differently once you try it.
- Combine the dry team:
- Whisk together flour, baking soda, and salt in a medium bowl, making sure there are no hidden pockets of baking soda. This step takes 30 seconds but prevents weird metallic tastes in your final bars.
- Mix wet ingredients until smooth:
- In a large bowl, whisk the melted butter with both sugars until you get a smooth, almost silky mixture. Add your eggs one at a time, then vanilla, whisking until everything looks emulsified and happy.
- Fold in dry ingredients gently:
- Add the flour mixture to the wet ingredients, folding with a spatula just until you don't see white streaks anymore. Overmixing develops gluten, which hardens your bars, so resist the urge to go full-force mixing.
- Add the fun stuff:
- Stir in the chocolate chips and colored candies, being careful not to crush them. The candies add both color and a little textural surprise.
- Spread and bake:
- Pour the dough into your prepared pan and spread it evenly with a spatula. Bake at 350°F for 23 to 25 minutes, watching for golden edges while the center stays slightly underbaked.
- Cool completely before drizzling:
- Leave the bars in the pan on a wire rack until they're completely cool, which takes patience but prevents the white chocolate from melting right off. This is the moment to make tea and sit with the anticipation.
- Melt white chocolate carefully:
- In a microwave-safe bowl, heat white chocolate and vegetable oil in 20-second intervals, stirring between each one to avoid burning. White chocolate burns faster than dark chocolate, so don't step away from the microwave.
- Drizzle and set:
- Once the white chocolate is smooth, drizzle it over the cooled bars using a spoon or squeeze bottle. Add sprinkles immediately if you're using them, then let everything sit for 30 minutes so the drizzle sets properly.
- Cut and celebrate:
- Use the parchment overhang to lift the entire slab out of the pan, then cut into 16 squares with a sharp knife, wiping the blade between cuts for clean edges. The moment when you see those perfect squares is worth every step.
 Save
Save There's something about bringing these bars to an event and watching someone's face light up when they bite into one. It's not just dessert, it's a small, edible way to say, I believe in celebrating good things with good food.
Customizing for School Colors
The beauty of these bars is how easily they transform. Use colored candies that match your school colors, and suddenly this simple recipe becomes a personalized gift that shows you paid attention to the details. I've made them in deep blue and gold, maroon and cream, and even hot pink and silver, and each version feels entirely different even though the base recipe stayed the same.
Storage and Make-Ahead Tips
These bars keep beautifully in an airtight container at room temperature for up to 4 days, which means you can make them the day before a party and actually enjoy the day instead of stress-baking. You can even bake the bars without the drizzle and add it the morning of if you want to keep things fresh and convenient.
Why These Bars Feel Special
Part of what makes these bars perfect for celebrations is that they don't feel like everyday dessert. The white chocolate drizzle, the candies peeking through, the custom colors, all of it adds up to something that feels intentional and festive without requiring pastry-chef skills. When you're celebrating something worth celebrating, this recipe matches that feeling exactly.
- You can prepare the pan and measure dry ingredients the night before to save time on party day.
- If your white chocolate doesn't melt smoothly, add a tiny bit more vegetable oil rather than trying to force it in the microwave.
- The parchment paper overhang is your secret weapon for getting perfectly uniform squares without struggling to cut from the pan.
 Save
Save These bars have a way of becoming the thing people remember about a celebration, the sweet moment that makes a good day feel a little more special. They're simple to make but generous in spirit, which is exactly what good celebration food should be.
Questions & Answers
- → How do I ensure the bars stay chewy?
Use melted butter and avoid overmixing the batter. Baking just until the edges turn golden helps maintain a moist, chewy center.
- → Can I substitute candy colors with other toppings?
Yes, you can use dark or milk chocolate chips or colorful sprinkles to customize the bars for any occasion.
- → What is the best way to melt the white chocolate for drizzling?
Melt white chocolate with a small amount of vegetable oil in short microwave intervals, stirring frequently until smooth and pourable.
- → How should I store the cookie bars after baking?
Store bars in an airtight container at room temperature for up to four days to keep them fresh and chewy.
- → Can these bars be made gluten-free?
Substitute all-purpose flour with a gluten-free blend of similar weight for a gluten-free version, ensuring mix-ins are also gluten-free.