 Save
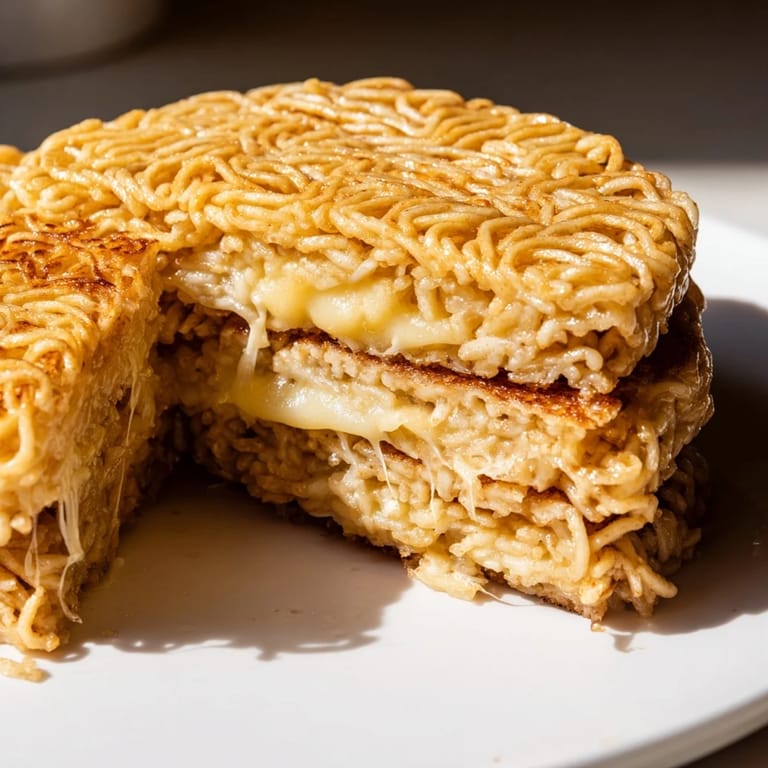
Save The first time I made this, I was standing in my kitchen on a random Tuesday evening, staring at a box of instant ramen and wondering how to turn it into something that wasn't just noodles in broth. My roommate had just come home with leftover cheddar, and I remembered reading somewhere about crispy noodle cakes in Asian cooking. What if I bound them with egg, pressed them flat, and treated them like bread? The experiment worked so well that I've been making these ever since, always with that same little thrill of turning something so simple into something unexpectedly indulgent.
I made these for my friend Marcus on a late night when we both had the munchies but nothing in the apartment seemed exciting enough to eat. He sat at the counter while I cooked, and the smell of butter and toasting noodles filled the whole place. When I slid the finished sandwich in front of him and he took that first bite, he actually closed his eyes like he was tasting something profound. "This is insane," he said, crumbs falling everywhere. That moment taught me that some of the best food doesn't come from complicated recipes—it comes from being willing to play in the kitchen.
Ingredients
- Instant ramen noodles (2 packs, 3 oz each): Discard those flavor packets—they'd make the buns too salty and weird. The noodles themselves are your blank canvas, and they're sturdy enough to hold together beautifully once they've been cooked and cooled.
- Large eggs (2): These are your binding agent, the thing that transforms loose noodles into a cohesive patty. They need to be beaten with intention so they distribute evenly throughout the mixture.
- Black pepper and garlic powder (1/4 teaspoon each): Keep these subtle—you want just a whisper of flavor in the bun itself since the cheese filling is where most of the richness comes from.
- Shredded mozzarella (1 cup): This is your stretchy, gooey base layer. It melts evenly and creates those appealing cheese pulls when you bite in.
- Shredded cheddar (1 cup): The flavor powerhouse. Sharp cheddar gives the sandwich personality and complexity that plain mozzarella alone can't deliver.
- Unsalted butter or neutral oil (2 tablespoons): Use butter if you want that rich, toasty flavor on your ramen buns. Neutral oil works if you prefer a cleaner taste or want to keep things dairy-free on the exterior.
Tired of Takeout? 🥡
Get 10 meals you can make faster than delivery arrives. Seriously.
One email. No spam. Unsubscribe anytime.
Instructions
- Cook and cool your noodle base:
- Boil those ramen noodles for just 2 to 3 minutes—don't let them get mushy. Drain them well and let them sit for a minute or two so they're cool enough to handle but still slightly warm and pliable.
- Make the binding mixture:
- Crack your eggs into a bowl and beat them with the pepper and garlic powder until you see no streaks of white. Pour in the cooled ramen and mix everything with your hands or a sturdy spoon, making sure every strand gets coated.
- Form the buns:
- Divide the mixture into four equal portions. Using damp hands or a ring mold lined with plastic wrap, press each portion into a round patty about the size of a burger bun. This is where patience matters—the firmer you press, the more the eggs will bind everything together.
- First cook—the ramen buns:
- Heat your skillet over medium heat with a tablespoon of butter or oil. Slide in all four patties and let them cook undisturbed for 3 to 4 minutes until the bottoms turn golden and crispy. Flip carefully and cook the other side the same way, then transfer them to a plate.
- Assemble the sandwiches:
- Lay two buns flat on your work surface. Pile half the cheese mixture (mix of mozzarella and cheddar) on one bun, top with the second bun, and press gently so the cheese starts to meld from the residual heat.
- Final toast:
- Wipe your skillet clean and add the remaining butter or oil over medium-low heat. Carefully place each sandwich in the pan and cook for 2 to 3 minutes per side, pressing gently with a spatula as you go. Watch for that moment when the cheese visibly melts and the outside buns crisp up to a deep golden brown.
- Slice and serve:
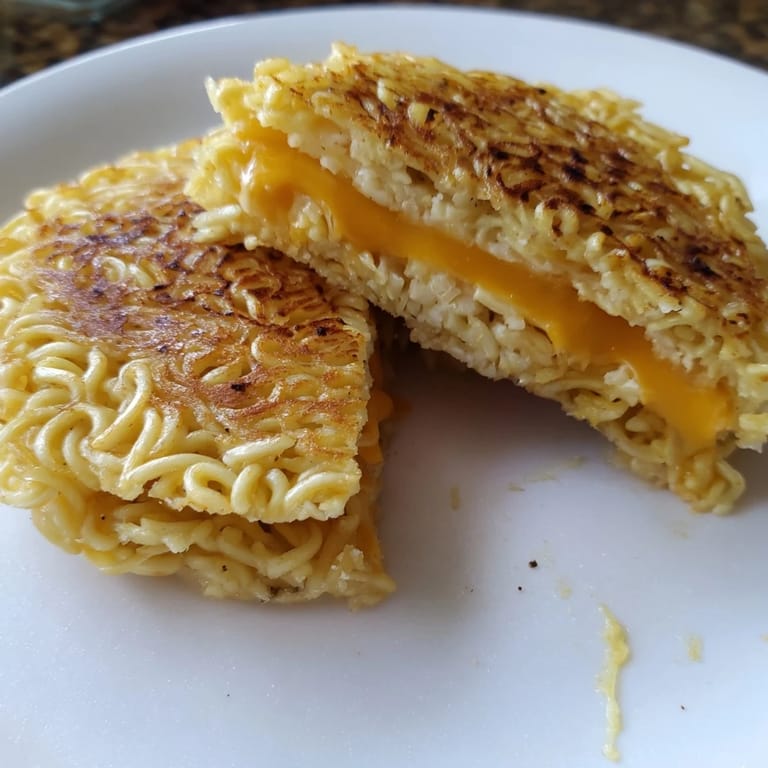
- Transfer to a plate and let them cool for just a minute so the cheese sets slightly. Cut diagonally if you're feeling fancy, and serve immediately while everything is warm and melted.
 Save
Save There was a moment during one of my attempts when I got impatient with the cheese melting and cranked the heat up too high, burning the outside buns to almost black while the inside was still a lukewarm mess. I was frustrated, but then I realized I'd actually learned something valuable about patience in cooking. Now when I make these, I slow down on purpose, watching the edges turn golden and listening for the soft sizzle of melting cheese. That burned sandwich taught me more than any perfect one ever could.
Flavor Variations That Work
Once you master the basic version, the fun part is riffing on it. Sliced scallions stirred into the noodle mixture add a sharp onion bite and visual flecks of green. A few dashes of sriracha or a spoonful of kimchi tucked inside the sandwich brings heat and funk in the best way. Some people swear by adding everything bagel seasoning to the egg mixture, and honestly, it's not a bad call. I've also experimented with swapping the cheese entirely—Gruyère gets nutty and sophisticated, provolone brings a subtle tang, and fontina adds a creaminess that feels almost luxurious. The ramen bun is so forgiving that it plays nicely with almost any melting cheese you throw at it.
What to Serve Alongside
This sandwich is rich and satisfying on its own, but it loves having something light and acidic nearby to balance it out. A bowl of tomato soup is the obvious classic pairing—that warmth and brightness just feels right. A simple green salad with a sharp vinaigrette works beautifully too, cutting through the richness with cool, crisp leaves. I've also made these for casual lunches where I just threw together some crudités and a yogurt-based dip, and that worked too. The point is that your ramen grilled cheese doesn't need much, but it does appreciate good company.
Storage and Reheating
These are best eaten fresh and hot, but I understand that life happens and you might have leftovers. You can store them in an airtight container in the fridge for up to two days, though the buns will lose some of their initial crispness. To reheat, pop them in a skillet over medium-low heat for a few minutes per side—this brings back much of the texture and melts the cheese again. The microwave will make them rubbery, so please don't do that unless you're truly desperate.
- Let cooked sandwiches cool to room temperature before storing so condensation doesn't make them soggy.
- You can also freeze the cooled ramen buns separately for up to a month and assemble fresh sandwiches whenever the craving strikes.
- If you're meal prepping, cook the buns ahead and store them in an airtight container, then assemble and grill them fresh when you're ready to eat.
 Save
Save There's something magic about taking two things that don't seem like they should go together and creating something that tastes like it was always meant to be. This sandwich is a reminder that the best meals often come from curiosity and a willingness to try something that seems a little weird.
Questions & Answers
- → How do you make the ramen buns crispy?
After cooking and draining the noodles, mix them with beaten eggs and seasonings, then form patties. Cook each patty in a hot nonstick skillet with butter or oil until golden brown on both sides for a crisp texture.
- → Can I use other types of cheese in this dish?
Yes, cheeses like Gruyère, provolone, or fontina work well and add unique flavor variations while still melting nicely inside the ramen buns.
- → What additional ingredients can enhance the flavor?
Adding sliced scallions, sriracha, or kimchi inside the sandwiches introduces extra layers of flavor and a spicy or tangy kick.
- → Is this suitable for vegetarian diets?
Yes, it includes dairy and eggs but no meat, making it appropriate for lacto-ovo vegetarian diets.
- → How should the sandwiches be cooked after assembling?
Once assembled, cook the sandwiches on medium-low heat pressing lightly, allowing the cheese to melt and the buns to crisp evenly without burning.