 Save
Save I discovered these protein cheesecake cups by accident on a Tuesday afternoon when I had leftover Greek yogurt and cream cheese but zero motivation to bake. The idea of pressing an oat crust into muffin liners felt wonderfully low-effort, and watching the filling come together with just a whisk made me feel like I'd cracked some kind of kitchen code. By the next morning, these little cups had set into something so creamy and satisfying that my post-workout breakfast routine completely shifted. There's something magical about a dessert that doesn't pretend to be healthy—it just is.
I made these for a friend who kept saying she felt guilty eating regular cheesecake, and watching her take that first bite—the slight pause, then the genuine smile—made me realize this wasn't just about macros or fitness. It was about permission, the kind you give yourself when food stops being a choice between delicious or responsible. She asked for the recipe before finishing the cup, which felt like the highest compliment a dessert could receive.
Ingredients
- Oat flour: This is your foundation, giving the base a subtle nuttiness and structure without heaviness—I learned that pressing it firmly keeps everything from crumbling when you lift the liners.
- Almond or peanut butter: The binder that makes the crust hold together while adding richness; natural butter works best because the oil helps everything stick.
- Honey or maple syrup: Just enough to bring the base together—too much and you'll end up with a dense, heavy bottom layer.
- Salt: A tiny pinch wakes up all the flavors, especially important since we're not baking.
- Cream cheese: Reduced-fat works beautifully here and keeps things lighter without sacrificing that tangy creaminess.
- Greek yogurt: This is the secret to extra protein and a fluffier texture than traditional cheesecake; non-fat or low-fat keeps the calories in check.
- Vanilla whey protein powder: Dissolves smoothly into the filling and adds serious nutritional value without any chalky taste if you blend it well.
- Vanilla extract and lemon zest: These small touches prevent the dessert from tasting like a protein shake and make it feel like a real treat.
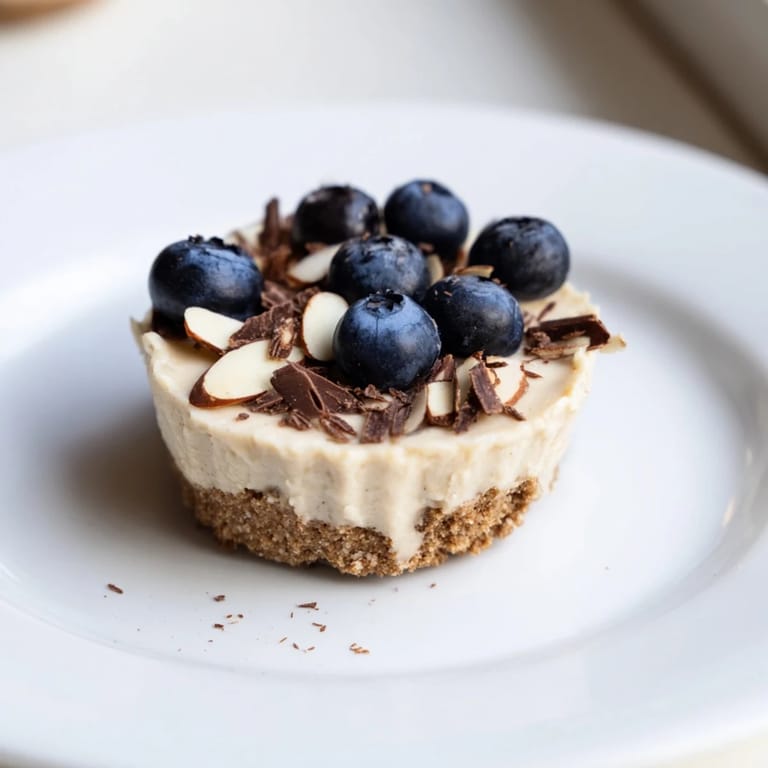
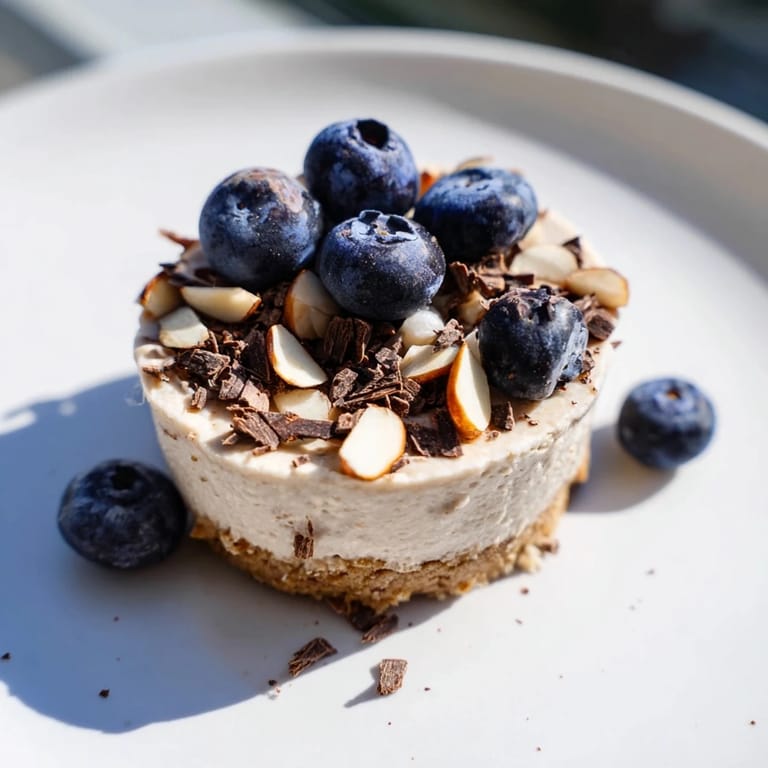
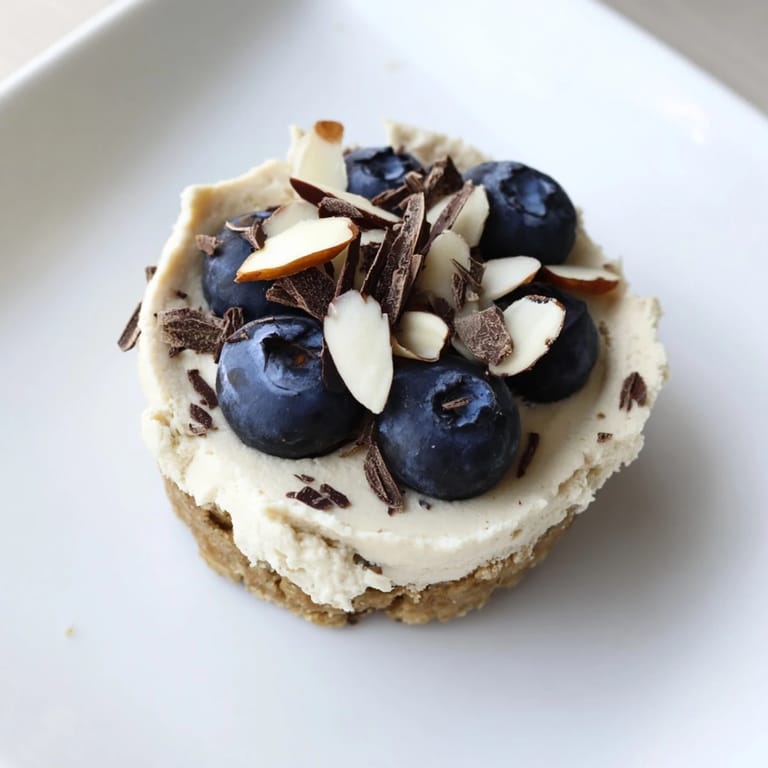
- Berries, nuts, and dark chocolate: Toppings that add texture and make each cup feel personalized.
Tired of Takeout? 🥡
Get 10 meals you can make faster than delivery arrives. Seriously.
One email. No spam. Unsubscribe anytime.
Instructions
- Create the crust base:
- Combine oat flour, almond butter, honey, and salt in a bowl until it resembles wet sand and holds together when squeezed. This should take just a minute or two and feel more like mixing than actual cooking.
- Press into muffin liners:
- Distribute the mixture evenly among six liners and press down firmly with the back of a spoon or small measuring cup. The key is making it compact enough that it won't crumble, but not so hard that it becomes dense and cake-like.
- Prepare the filling:
- Beat the softened cream cheese until completely smooth, about a minute, then add Greek yogurt, protein powder, honey, vanilla, and lemon zest. Mix until creamy and fully combined—this is where a hand mixer saves your arm.
- Layer the filling:
- Spoon the cheesecake mixture over each base and smooth the tops with a spatula or the back of a spoon. The filling should be thick enough to hold its shape but spreadable without resistance.
- Add your toppings:
- Scatter berries, nuts, or chocolate shavings on top while the filling is still soft so they stay in place as everything sets.
- Chill and set:
- Refrigerate for at least two hours until the filling is firm and holds its shape when you gently tap it. The longer you leave them (up to overnight), the firmer and denser they become.
- Release and serve:
- Gently peel away the muffin liners and transfer each cup to a plate or container. They're best eaten straight from the fridge when they're still perfectly cold and creamy.
 Save
Save There's a moment when you pull these cups out of the fridge and they're perfectly set—firm enough to hold their shape but still creamy on the tongue—that makes all the waiting worth it. It's the kind of dessert that made me realize healthy eating isn't about deprivation at all; it's just about being intentional with what you choose to make.
The No-Bake Magic
One of the best parts about these cups is that there's genuinely nothing that can go wrong. No oven to preheat, no baking time to calculate, no worried checking through an oven window to see if they're done. You mix, you press, you chill, and somewhere in those two hours something almost chemical happens—the filling firms up, the flavors settle and deepen, and what was loose cream cheese becomes actual cheesecake. It's like the fridge does the heavy lifting while you go about your day.
Playing with Flavors
The vanilla and lemon combination is my go-to, but I've gotten creative with this base. Swapping the vanilla for almond extract, adding cocoa powder to the filling, stirring in a spoonful of espresso powder for a morning version—all of these work beautifully because Greek yogurt and cream cheese are genuinely good at playing well with other flavors. The protein powder is the only ingredient where I stick with vanilla; other flavors can clash or taste off in ways that feel hard to fix.
Storage and Serving Suggestions
These keep beautifully in the fridge for up to four days, though honestly they rarely last that long in my house. You can even freeze them in an airtight container for up to two weeks if you're thinking ahead. Serve them straight from the fridge for maximum creaminess, or let them sit at room temperature for ten minutes if you like them slightly softer.
- A drizzle of berry compote on top tastes restaurant-quality and takes two minutes to make.
- They pair perfectly with strong espresso for that guilt-free dessert-with-coffee moment.
- Bring them to a potluck and watch people be genuinely surprised that something this good is high in protein.
 Save
Save These little cups have become my answer to the question I used to ask myself every afternoon: can I have something that tastes amazing and actually feels good to eat? The answer, it turns out, is yes.
Questions & Answers
- → Can I make these cups gluten-free?
Yes, substitute oat flour with almond flour or gluten-free cookie crumbs to keep it gluten-free.
- → How do I store leftover cheesecake cups?
Store covered in the refrigerator for up to three days to maintain freshness and texture.
- → Are there vegan alternatives for this dessert?
Use dairy-free cream cheese, plant-based yogurt, and vegan protein powder to create a vegan-friendly version.
- → What toppings work best for these cheesecake cups?
Fresh berries, chopped nuts, or dark chocolate shavings add complementary flavors and textures.
- → Can I prepare them in advance?
Yes, prepare and refrigerate for at least two hours before serving to let the filling firm up properly.
- → Is it possible to adjust sweetness?
Absolutely. Adjust honey or maple syrup quantities to suit your taste preferences.